So, now that Windows 11 is officially released, anyone can download and install it on their PC. So, in this post, I’ll show you how to create a bootable USB flash drive for Windows 11. We are going to look at two different methods in making Windows 11 Bootable USB, the first which is using Rufus and the second by using Power ISO.
To make the process so easy for you, I created a step by step tutorial on how to make the Windows 11 Bootable and the video is on youtube, you can watch the video below if you prefer that to reading this blog.
Click on this to Download Windows 11 ISO File
Method 1: How To Create Bootable USB Windows 11 With Rufus
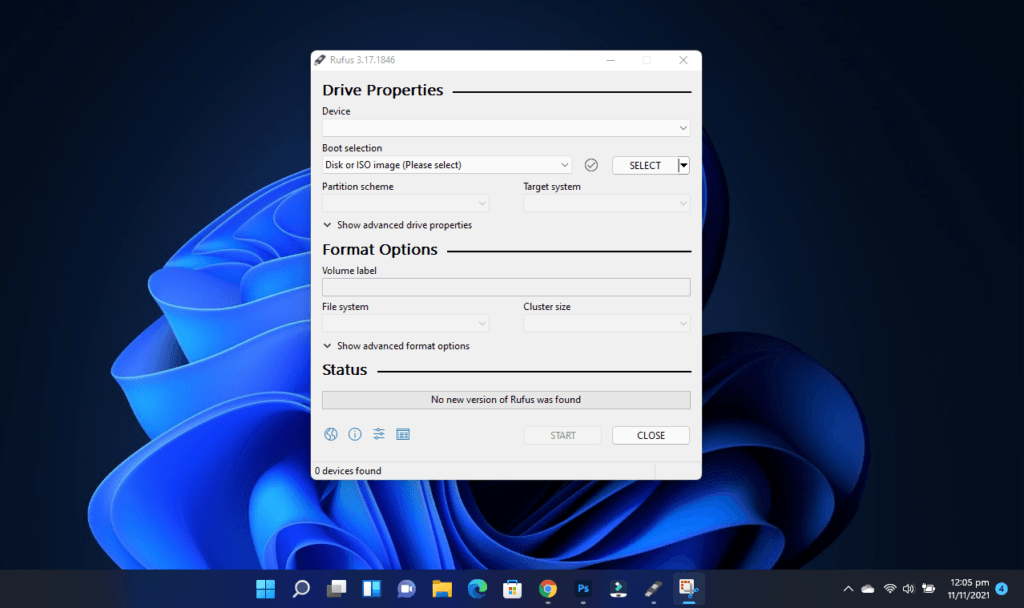
Rufus is a Windows application that allows you to create a variety of bootable devices from external drives such as USB pen drives and SD cards. It is free to download and it takes a few seconds to download it. Once rufus is downloaded, you can follow the steps below to create a bootable USB drive.
- Insert your flash drive into your computer. Note that the size of the flash drive you are to use should be much higher than the size of the ISO file you are using.
- Launch the Rufus application

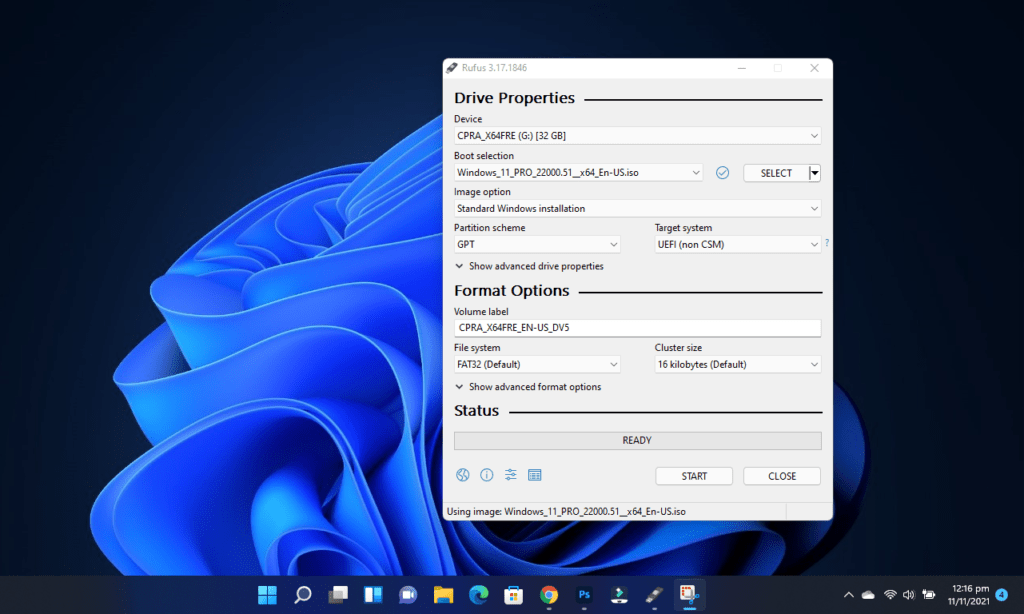
- By default, the device section is going to pick your flash drive. Should you have more than one drive, then you go ahead and select the drive you want to create the bootable on.
- At the Boot selection, that is where you will select the ISO file to be used for the Bootable.
- At the partition scheme, you are going to select your Drive’s partition scheme, this could be a GPT or an MBR.
- Once everything is selected, you should see the READY button, which indicates that you are ready to start copying your files, so go ahead and click on ready.

- Now you wait for all the files to be copied and your Bootable drive is ready!
Also Watch: iPhone 13 Pro and Pro Max: 120Hz Display, Better Cameras, Better Battery Life?


